Getting Started!
Purchased on Marketplace
No Unboxing Required
Locate your unboxed product in your received folder: MoreThanPixels: Evidence Markers
Purchased from In-World Store
Unboxing Required
Locate the boxed product MoreThanPixels: Evidence Markers
and rez to unpack.Once unpacked, locate the folder:
MoreThanPixels: Evidence Markers
Instructions
Rez Rights Required! In order to use this system, you must have
rezzing rights on the parcel.
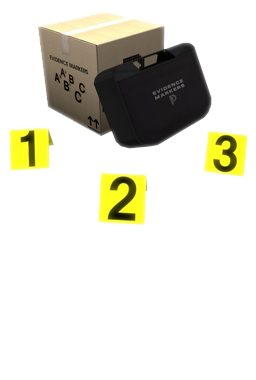
Using the Evidence Markers
- Locate and attach the item:
MoreThanPixels: Evidence Markers Case (Attach). The attachment will appear in your right hand. - When you're ready to use the Evidence Markers, go into mouselook, then aim & click where you'd like to set down the case.
- Retreive the Evidence Markers from the case — Click the top of the case to
open, then click the markers to grab them.
Accept Permissions >> A permissions dialog will appear. This is required in order for the markers to attach to your hand.
- You're now ready to start setting down markers! Simply go into mouselook,
then aim & click where you'd like to set them down.
- Tip: By default, the markers will automatically increase the value/character accordingly as you set them down.
- When you're finished placing markers, you can put them back into their carrying case by clicking the inside of the case.
- To pickup the case, simply close the lid and then click & hold the body of the case and it'll be back in your hand.
Removing Evidence Markers
Simply click on an Evidence Marker to have it removed.Evidence Marker Settings


Next Marker: Choose what the next markers value/character will be — input one of the following inputs:
- A number between 1 - 32.
- A letter between A - Z.