Getting Started!

Purchased on Marketplace
No Unboxing Required
Locate your unboxed product in your received folder: MoreThanPixels: Radar Speed Sign
Purchased from In-World Store
Unboxing Required
Locate the boxed product MoreThanPixels: Radar Speed Sign and rez to unpack.Once unpacked, locate the folder:
MoreThanPixels: Radar Speed Sign
Radar Speed System Components:
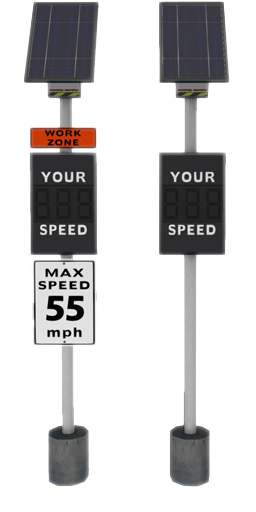
- MoreThanPixels: Radar Speed Sign - Themed - vx.x
- MoreThanPixels: Radar Speed Sign - Non-Themed - vx.x
Setup Instructions
Quick Setup
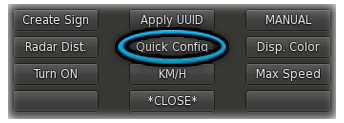
A quick way to configure your Radar Sign is to use the Quick Config option from the menu; you'll receive a link to access the web customizer tool.
Once on the website, you'll be able to apply a preset theme and configure the radar range settings.
Once on the website, you'll be able to apply a preset theme and configure the radar range settings.

Additional Menu Options
- Radar Dist — Set the radar scanning distance.
- Disp. Color — Set the display color for the numbers.
- Turn On / Turn Off — Enable/disable the radar sign.
- KM/H / MPH — Change between KM/H or MPH.
- Max Speed — Set the max speed limit. This will cause the display to flash red when drivers are caught exceeding the max speed limit.
Creating Custom Signs
You can easily create custom signs with the built-in Create Sign feature.
Have an idea for additional themes? Let us Know!
- Left-click the sign and select Create Sign.
- The first text-box to appear will ask you to input the maximum speed.
- The second text-box to appear will ask you to select either: MPH or KM/H.
- The final text-box to appear will ask you to select the theme: Fines Double, Radar, Slow, Work Zone, School Zone, or Playground.
- You will now be prompted to open a URL. Once open, you should be offered to download the generated image. Once downloaded, upload the image to Second Life and copy the texture UUID (Right-click the texture & select "Copy Asset UUID").
- To apply the theme, left-click the sign and select Apply UUID. A text-box will open, paste the texture UUID and submit. Your theme should now be applied!
Have an idea for additional themes? Let us Know!
Changelog
v1.0.2
improvement
You can now toggle the speed display brightness on or off. To use this feature, navigate to "Quick Config", open the link, and select "Toggle Full Bright".
v1.0.1
improvement
The RSS online configuration tool has been moved to a new server.
v1.0
Initial Product Release
